Showing posts with label skirt. Show all posts

Tuesday, 26 November 2019

A skirt!

I made a super easy, simple skirt to attend a wedding.  Only three steps: measure some 2" wide elastic for my waist and sew it together to create an elastic circle. Sew a side seam up the fabric to create a tube of fabric. And to finish, stretch the elastic as I sew it onto the fabric.  No hem required.  One elastic-waisted skirt all finished. 

But it is the fantastic, hand-printed fabric that makes this skirt anything but simple.  Look at this sumptuous, hand-printed gold leaf border!


I loved wearing it to the winter wedding.
The person who took this photo was tall, so
puts the gold border in the shadows, but it's
the only photo I have of the skirt on the day!

Unfortunately, I cannot remember where I bought the fabric panel from. I have been googling it, going through old receipts, but I can't find it. I do remember seeing it on instagram stories well over a year ago, and I bought it immediately.  The panel of fabric was £60 at the time.


Thursday, 3 December 2015

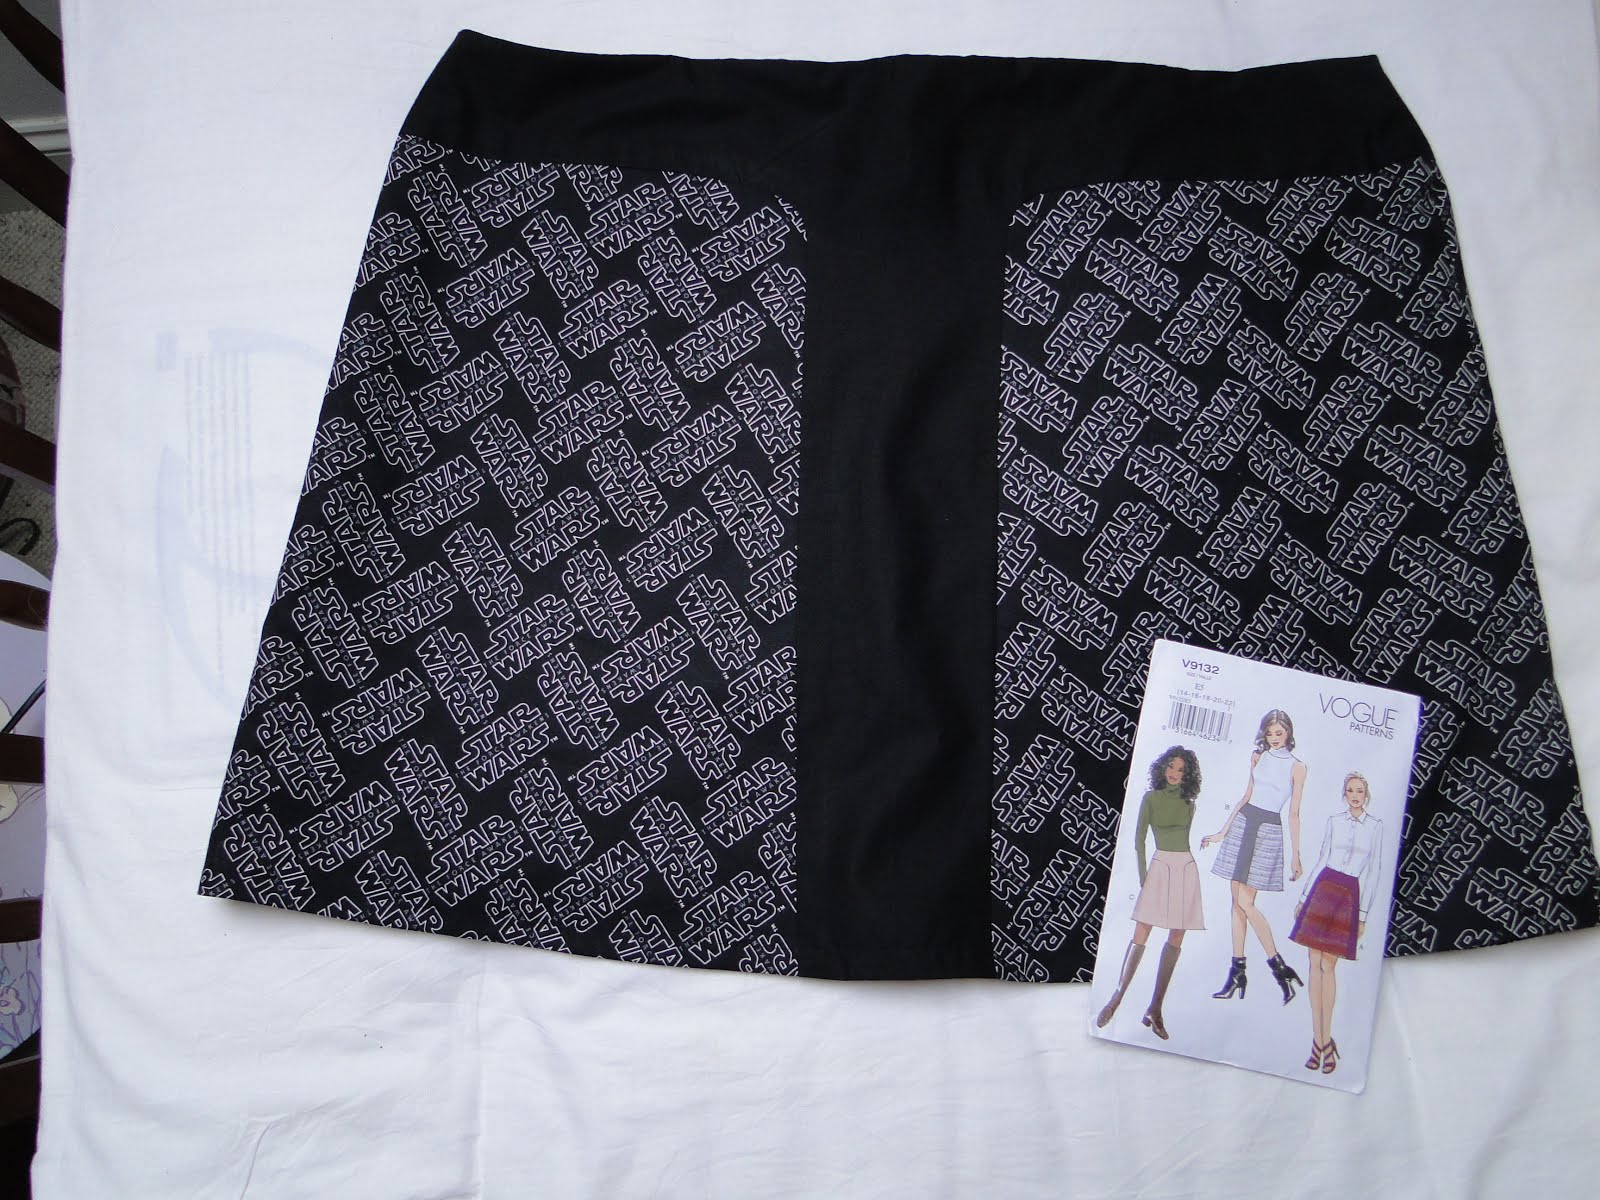
Star Wars The Force Awakens : The Skirt

I have made a gift for a Star Wars fan!
The lines and style of this skirt reminded me of Boba Fett's helmet so I knew I couldn't go wrong with Vogue pattern 9132.


Some changes I made

It is a very short skirt, so I added two centimetres to make it 50cm in length, but even then it was still a bit short so I used bias tape along the hem and just turned it up 1/4" instead.

I didn't use the recommended fabric, which is "Gaberdine, crepe, linen, lightweight woolens" I used cotton instead.  I really like that it looks a bit like a check pattern from a distance and you only see the logo close up.  The Star Wars fabric is a fully licensed product from Camelot Fabrics

The skirt pattern is for a fully lined skirt.  But I couldn't believe there was no separate lining pattern piece!  The instructions ask you to use the same pieces for the skirt!  Can you imagine doing four more of those curves in lining fabric?!  No thank you!  So I made the skirt pieces up, front and back(including the zip), then before sewing the side seams I just lay the skirt front on top of my lining fabric and cut out a piece exactly the same size.  I did the same with the back. It fit perfectly when I sewed the lining to the skirt at the waist band.

Some tips if you are going to sew this pattern

Sewing these curves was a bit of a pain, I had to undo all four of them and try again.  If you make this skirt I would recommend after stay-stitching and then snipping the curve on the T-shaped or L-shaped fabric piece, have it underneath when stitching together.  Stitch slowly, hold each fabric and slowly bring them together under the foot.
Not perfect

Also, the little triangle pieces that are supposed to line up - they didn't.  Whichever end I started at, the first two little triangles matched up but after sewing the curve the second ones never did.  But by the time I stitched all the way to the ends of the fabric it matched up just fine at the ends.

I also thought it was quite an exaggerated A-line, so once I got my friends waist and hip measurements I just drew a straight line down to the hem instead of sticking to the wider hem line for her size.  I think I brought it in 3 sizes at the hem.

I do hope she wears it to the premiere of the new movie, as she has reserved tickets for a VIP theatre on the night of it's release!  Fingers crossed it fits!

Sunday, 8 February 2015

There's a Bug on my Skirt!

Aaarrgh!

I loved this curtain fabric from Ikea when I first saw it but I just couldn't imagine what I could do with it and so I passed it by.  But the lovely seed heads and beetles didn't leave my mind and I would sometimes find myself thinking about them.  So I mulled it over and came up with the idea that it could so easily be a very wearable skirt!

After making and then wearing my Roald Dahl Matilda skirt, I knew I didn't want a flared, pleated skirt again, as despite the thicker, upholstery-style cotton, it often blew up in the wind, and a bit too much thigh was exposed when I bent over.

So this time I have gone for a straight skirt.  I had been kindly given a collection of patterns from moonthirty last year, and this OOP pattern had a perfect, plain straight skirt.  (mind you, when I opened the pattern up there were no instructions - I may have misplaced them!  But I think I've managed fine without them)  Simplicity 4950 is out of print now but can still be purchased on ebay, etsy, etc.  It has a buttonless jacket in two lengths, a darted sleeveless top, trousers and a straight skirt.  I have enough fabric left over that I may make the sleevless top too.

There was a freezing wind today, but the sun was shining so we thought we'd better make the most of the blue skies and take a few photos of the skirt.
I really love the leafy fronds and the animals on this skirt, but I had to be very careful with the pattern placement of some of the seed-head illustrations.

My Alterations

I didn't put in the side split as I couldn't find the instructions but I also didn't think it needed one.
I added 4" to the length when cutting out, but still turned the hem up the recommended 1 1/4".
I cut out the size 24 but added 1" to all side seams.  This helped to make the skirt gently skim over my tummy, but I wish I had only added the extra width starting at the hips and not from the waist.
Either the skirt is meant to be low slung and sit lower than the natural waist, or I have now made the skirt too big around the waist.
This is the amount of room I have in the waist at the back.
I will unpick the facing at the back and take those two waist darts in another inch, then readjust the facing and reattach it.  That should make it more fitted across the back, and hopefully it will then sit on my natural waist instead of dropping down below the waist.
This skirt has two darts at the front and two at the back, a facing waistband, an invisible side zip and overlocked edges.  It was fairly quick to put together and once I have perfected the fit of the darts in the back to account for the difference between my bottom and my waist, I think I will have a very easy-to-use skirt pattern!
One last picture; I couldn't wait to get my coat back on!  But the scenery up the Glen is just lovely!

Saturday, 21 June 2014

Waltzing Matilda Skirt

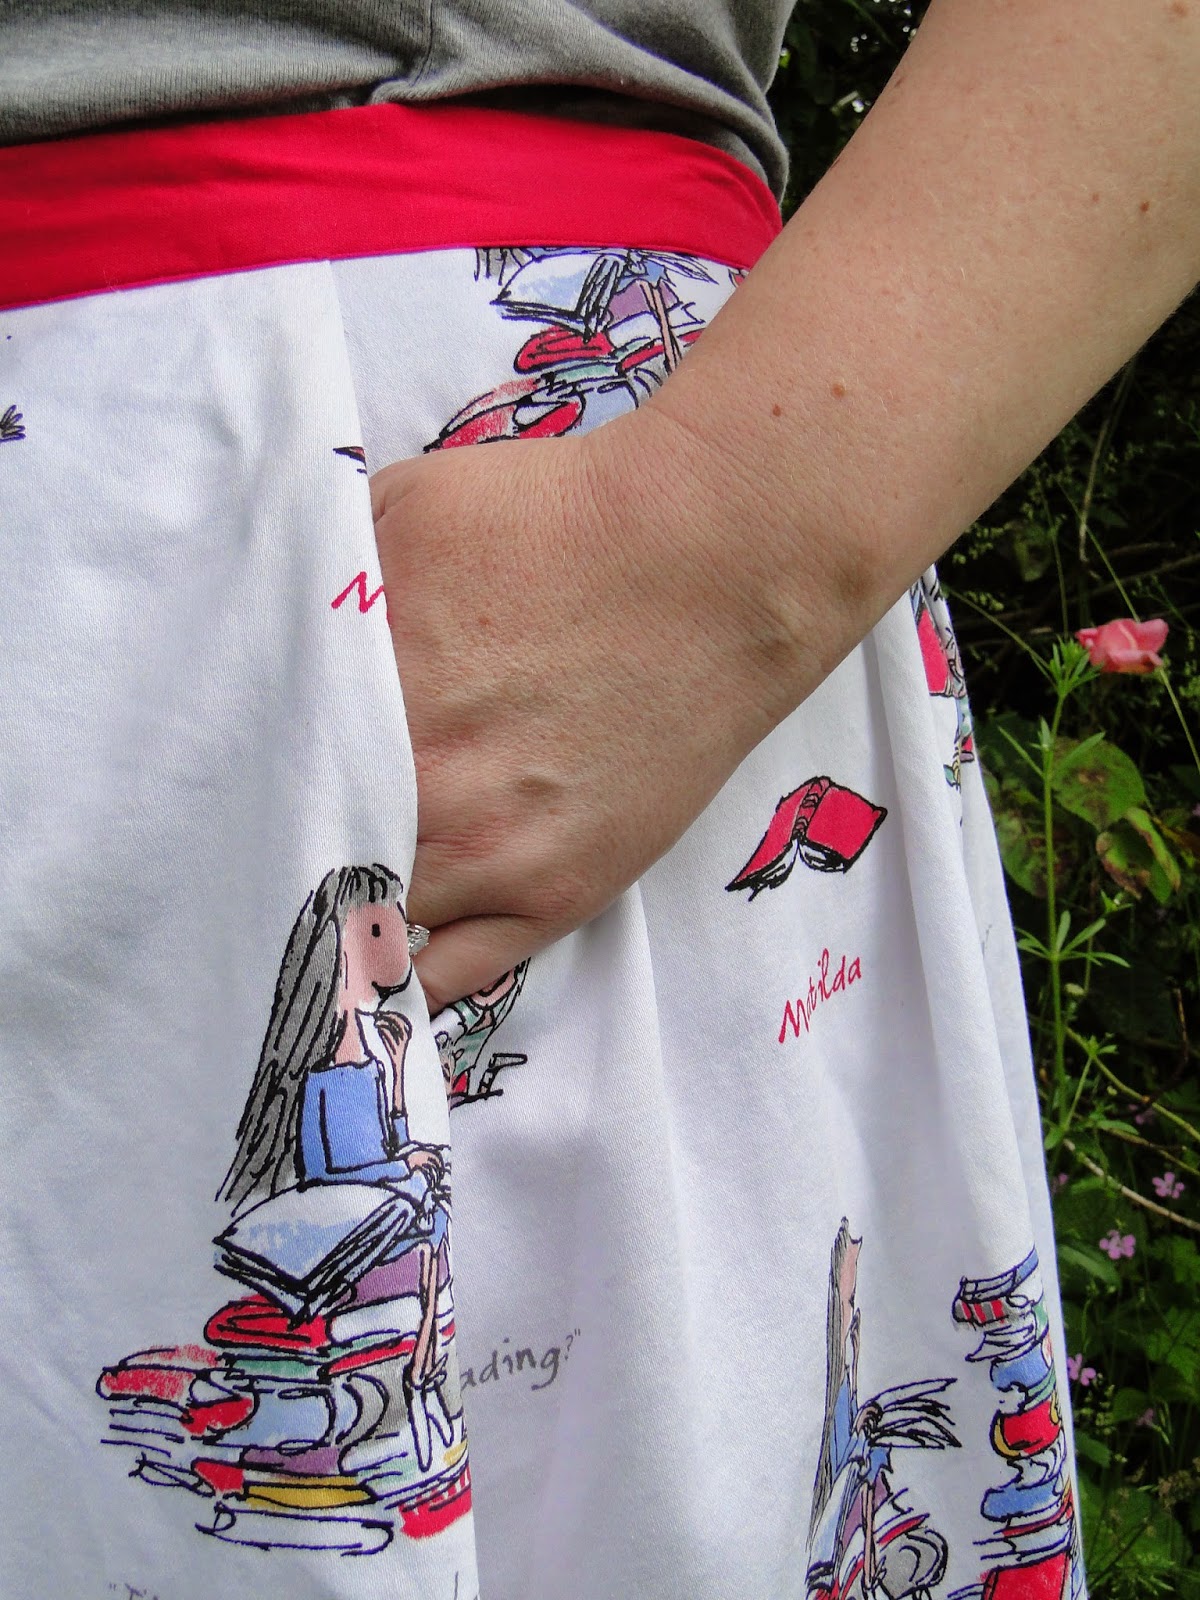
I have used this pattern before to make my Measuring tape skirt, which you can see here.  I decided that since I had a skirt representing numbers, I'd better have a skirt representing letters too, and as soon as I saw Quentin Blake's sweet illustrations of Roald Dahl's book worm Matilda on fabric, I knew I'd found perfect skirt making material!  It's a wonderful book, and the movie is pretty good too.
Fabric is from Plush Addict

I've used Butterick 5285 again, and again have made it too big for myself!  I used the finished garment waist measurement that is marked on the paper pattern piece to decide which size to do, and even then thought I was going to have to spend my days breathing in whilst wearing it, but this pattern seems to run big, both times I've made it up.

But it is still wearable, and I do love it!

For the waistband I chose a Robert Kaufman Kona Solid in the pomegranate colour and it matches perfectly to the flying pink books.
I love having a skirt with pockets!  Whenever I wear a skirt without them I always seem to be slapping my sides to find something that isn't there, or scooping my hand at the side seam only to be reminded that there is no pocket at all!

I made the box pleat version of this skirt, and the back to pleats fold right up to hide the zip.  Luckily for me, as I only had a yellow one to put into this skirt!

And in my hot little hand is a Tilly and the Buttons tote bag!  Available here in her shop.

Monday, 18 November 2013

Measuring tape Skirt

I have made myself a skirt at long last!
Here's a little pocket detail to pique your interest

I own well over 40 skirts and yet unbelievably this is only the second skirt that I have ever made.  I have been giving this a bit of thought and I think it comes down to two things.  First, it is all the lovely fabrics that shop-bought skirts are made from.  So many colours and textures that I am always spoiled for choice and have always been able to find skirts that I love.  Secondly, skirts don't seem to be a popular garment where I live.  Most women that I see at work, out shopping or in business seem to wear black trousers or jeans.  Which means most skirts don't sell and end up in the next season's sale racks - ready for me to snap up at a bargain price!

So here it is - my new skirt!
I bought this fabric last year from Mandors in Glasgow, served by the lovely Hazel (the first blogger that I ever met in real life).  I chose the brighter version of this fabric because I wear reds, purples, mustards and sometimes aqua, so even though it is quite a bold palette, it will integrate well into my wardrobe.
I usually wear skirts with the tee shirts over the top of the waist bands.

The pattern is Butterick 5285, I made up view D.  It has 6 pleats at the front and 6 on the back but aren't top-stitched.  The other great thing is that it has pockets!  I was able to create the pockets using just one of those quilter's fat quarters, which gives the pockets a little surprising touch.

I had originally planned to self-draft this skirt, as part of my Fall Essentials Sew Along, but saw that a website I was buying some thread from also had this previously-out-of-print pattern available!  I was over the moon, as I had seen Margo make some lovely skirts with this pattern.  The skirt pattern is very versatile, but the front piece needs to be cut from 150cm wide fabric, which mine wasn't, so I now have a seam up the middle - but you can't tell with this vertically striped fabric anyway.

Posterior for Posterity!  Remember to try to include a back shot ladies.
I was so keen to get these photos taken that I still need to attach the hook & eye to the waistband.
Linking up with Project Sewn: Signature Style.  I love wearing skirts with a blazer and boots, and I work with numbers so this skirt and outfit combination is right up my alley.  I have been getting lots of positive comments when I wear this too!
Related Posts Plugin for WordPress, Blogger...