Showing posts with label crafty. Show all posts

Friday, 25 March 2016

Knitting Needle Roll

I was planning to attend a knitting class at the Edinburgh Yarn Festival in March this year, so I wanted to make a small knitting needle holder to take along with me, as the only instructions were to bring along needles that are bigger than the size recommended on the yarn's label.  I didn't know just how many sizes bigger, so I wanted to take a small selection.  (I will write more about the Yarn Festival in my next post)

I have this 5006 Butterick pattern in my stash so put it to good use to make a new roll for my needles.

 It also has a pocket for crochet hooks, which I can do a bit of, but I would never really need them both at the same time.  But I included it anyway, as it is a sweet addition to the roll.

You lift up the crochet pocket to get access to the knitting needles.

A friend recently showed an interest in learning to knit, after seeing my Baable hat.
Shetland Wool Week Baa-ble hat
Of course I said that I would, if she bought some needles and 4 balls of wool.  And for only the second time in my life, a person who wanted to learn something crafty from me actually went out and bought the materials!  With most people it's just talk, but this time she demonstrated true desire and commitment!  She has proved to be a very good learner and has made an amazing start to knitting, I am so proud!
And so I thought I would make her a needle holder too, as a gift.


It's a quick make, about 2 or 3 hours.  I used fabrics from my stash, all fat quarters.  I think I will also make the larger crafty bag from this pattern, at some stage.

Next post: Edinburgh Yarn Festival 2016

Sunday, 17 May 2015

The Results of my Own little Craft It Forward project

At the end of last year I was lucky enough to receive a beautiful handmade bag from Fiona at Celtic Thistle Stitches because she was doing a little Craft-It-Forward project and I happened to be one of the first commenters.  So recently I also offered to make three crafty things for the first three people to comment on my blog post, and now that Fiona and Jen  have received their gifts from me, (hopefully Kirstin receives hers soon?) I want to share what I made!
These are pincushions with hanging pockets and a loop to hold onto a bucket for collecting threads and trimmings.  I got the idea from Lynz when she made a very snazzy one for her own craft room, and I'm so grateful that she linked to the instructions - a great tutorial from Elizabeth Hartman.  The pin cushion is weighted down with rice and has a felt strip down the middle for sewing needles.  It is attached to a hanging pocket that can sit next to your sewing machine or on your armchair.  There is a loop to attach the threads bucket, but if you aren't using it then the loop tucks in to one of the pockets.

Fiona loves Tula Pink fabric as well as lime green, so this will be hers:
Fabric: Tula Pink, V&Co.


Kirstin loves bold colours, feminine Ulyana and knitting, so this will be hers:
Fabric: Katarina Roccella


Jen lives by the beach and looking at her blog seems to favour aqua colours, so this is hers:
Fabric: Katerina Roccella


It was really nice to look at these creative lady's blogs and decide what colours and fabrics they might like.  I enjoyed thinking about something crafty and useful that people who sew may like to have too.

Now I can't wait to see each of these blogger's Craft-It-Forward projects!
Feel free to follow them and sign up when they post their own C-I-F!
Fiona blogs at Bendigo Lioness
Kirstin blogs at Sew Classic
Jen blogs at Quilter in the Closet

Saturday, 28 December 2013

Liberty Hexies put to good use

I bought these little hexagon papers and pre-cut fabrics from very kerry berry fabrics back in Autumn and really enjoyed sewing them together into flower shapes whilst commuting to Glasgow.  I didn't have any plans for them and so made it a goal to find them a home before the year was out.
And now the little hexie flowers do have homes: I made them into A6 notebook covers to give to friends!
I have five female friends that work really hard and I hope that a little old-fashioned looking notebook will be well appreciated by them.  I used a running stitch to embroider their names inside a leaf shape.
The inside flaps are made from a liberty lawn fat quarter that I received in a goodie bag at the Edinburgh Stitch Gathering.  

Construction Details

I used the notebook to decide on the size of fabric to cut, and made the flaps 3" wide, which is about half the width of the notebook.  For future reference, here are the measurements I used:
For each A6 notebook cover cut the following:
6 3/4" x 10 1/4" rectangle --> 2 pieces of background fabric, 1 piece of fusible interfacing
3" x 6 3/4" rectangle  --> 2 pieces of background fabric, 2 pieces of fusible interfacing, 2 pieces of liberty print

I fused the interfacing to the fabric before stitching on the hexie flowers and doing the embroidery and fused the interfacing to the liberty fabric for the flaps.  Whilst sewing the long edges together I stitched a slightly smaller seam than the usual 1/4" just to make sure there was enough room to squeeze the cover into the side flaps.

I even stitched these little "Handmade with Love" tags on the inside covers to give it a personal touch:
I am linking up with Leanne's Finish-A-Long.  This completes my list of Quilty goals that I aimed to finish before the end of 2013.
she can quilt
Links to everyone's Finished items

Monday, 29 July 2013

Crafty-Ness

At the end of August I am going to a Stitch Gathering in Edinburgh.  A choice of two out of a possible 6 workshops were available, and I am fortunate to be enrolled in both of my first choices! I love it when that happens.  On the day we will be getting a goodie bag, coffee breaks and lunch all provided.  Sounds like a lot of fun to me.
We were sent a fabric ticket to create a colourful patchwork block, and assigned a person to create a name-tag for, which I have posted about previously.
I recently received the supplies list and so have enjoyed a little online shopping for the few bits and pieces that I didn't already have.

Three new things

In preparation for spending a day in patchworker's heaven, here are a few things that I have been making:
I had previously made a large ironing board that sits next to my desk along with a large cutting mat.  So this week I have made a mini board using a piece of hard board from the back of an unused picture frame.
This mini ironing board is the same size as my mini cutting mat and fits perfectly into my sewing machine travelling bag!
I also made a padded, drawstring bag for all my sharp tools to be safely carried within.
And the last thing that I NEEDED was a ring pin-cushion.  I got the idea from a Amy's Crafty Shenanigans blog and then googled for a tutorial, and found one here.  I first made the red one and it turned out as pointy as a gnome's hat, so I decided to make another one but this time with a curved top.  I thought more carefully about my fabric choice and used a fabric design that says "make some quilts" on one side and "take it easy" on the other.

I am really looking forward to doing the two workshops that I signed up for, and looking forward to meeting like-minded creative women.  I will let you know how it goes.

Wednesday, 8 May 2013

Kitchen Eye Candy

Just a quick kitchen post.
I recently saw these tea towels and thought they were adorable, so I just had to make them mine!
It is a bit weird to have a post about tea towels, but I think you may agree that it's worth it!
sew a little happiness

make do and mend

cook sew knit bake
there isn't much that I can't do
They came as a set of 6, but these were the most detailed three.  If you're interested, I got them froma UK shop called Next.
*I paid for these with my own money and am not affiliated with this store, in fact I usually don't buy anything from them.

In order to justify this pricey spend on tea towels, here is something I actually made for my kitchen:
My own little egg basket
I have my own hens!  I love them so much!  So I wanted to make something special to collect their little eggies in.
I folded and gathered a strip of the dark blue hen fabric, then stitched it between 2 oval shaped pieces of the light blue hen fabric, with two rectangles of wadding sandwiched in between.  This is to make sure there isn't any wadding in the corners, that way it will fold up around the curves of the basket.  Then I tied a matching hen ribbon to the basket.

What do you think of them?  The word-y one and this green one are both printed and this pink one is made of two fabric pieces machine appliqued on.

Tuesday, 16 April 2013

International Craft Swap

I have made a little gift for a clever sewing blogger in New Zealand, as part of House of Pinheiro's International Craft Swap.  The idea is to hand make something Nautical and add this to a small gift for an international sewing enthusiast.  Everybody who wanted to participate was paired up and I was partnered with the very talented Kat from New Zealand.
Kat has an amazing collection of vintage patterns, so much so that she runs a separate website just to catalogue them all.  She is also very organised with her fabric and notions collections.  Such an organised and imaginatively creative person could surely want for nothing that she couldn't create herself...
So instead of looking at her sewing world, I took my inspiration from the recent addition to her home, a lovely baby boy.  This gave me some direction to chose bright, bold blues but not what to use them for.  Then I asked the blogging community for some help, which turned up this little gem:
Nautical detail of my International Craft Swap.

Can you guess what it is yet?


Lunch bag made at Nessa's Place for Kat.
This is a lunch bag meant to carry those square compartmentalised Bento boxes.  It has a drawstring lid to keep things from falling out.
Really it could be used for anything = small crafty projects or even for little boys to collect all their toys and treasures inside.  I'm sure there will be lots of uses for this Nautical bag.  I hope Kat finds it useful.

The lunch bag has a draw string opening and is fully lined.
The tutorial is from Ayumi's website the Pink Penguin.  It is a well written and clearly photographed tutorial.
I did make a practice one before I made this one, which I blogged about previously.

In Conclusion

This challenge brought up lots of food for thought.  What to make for someone who can make things for themselves, along with a lot of 'what will she think' worries.  But in the end, it is only a small gift and it really is the thought that counts - the idea of having a handmade gift arrive in the post from the other side of the world, a special something that somebody has put a lot of thought and time into creating, just for me.  That is a heart warming thought in deed.
And finally, the 'what will she think' worries?  I have learnt that all sewing bloggers really want to encourage and support one another with kindness and a generosity of spirit.
...Now let's just hope the Postal Service doesn't let me down...I haven't heard if it's arrived yet..eek!
IT HAS ARRIVED! Yay!  And Kat likes both the bag and the little gifts I sent.  She is planning to take her lunch to work in this tomorrow.  Success.


Friday, 5 April 2013

My Fancy Magic Marking Pen

Now this is one dressmaking pen that you will love!

It is not specifically designed for sewing, but many people do use it on material, and for a very good reason...

IT CAN BE ERASED WITH AN IRON!!!!!  

How fantastic is that?!


Here is a little video I made using the pen demonstrating how unbelievable it is:


(I chose the demonstration fabric because it was cute, but just to let you know, it does already have little black flecks in it, and these weren't made by the pen)
I bought this as a 3 pack in the stationery aisle at the supermarket, for about £6.  A while ago I'd been told about them by a quilter, but this week has been the first chance I've had to actually go into the supermarket and see them for myself.  (We get our groceries delivered usually, so I do miss browsing the aisles)


Usually I use tailors chalk for dressmaking and a fade-away pen for crafty things, but sometimes the chalk doesn't go away until I wash the garment and every now and then I press too long with the fade-away pen and it doesn't fade away.  Hopefully this will be my new go-to fabric marking pen.
Would be interested to know what marking tools you favour!

Please note: I bought these pens at retail price with my own money, I am not affiliated with this pen making company (nor the iron company) in any way, and these words are all my own observations.

Sunday, 24 March 2013

My Very Own Lunch Bag

I recently fell in love with a few small pieces of fabric  called fat quarters, and I didn't really know what I was going to do with them, I just knew they had to be mine.  (Fat quarters are squares of fabric that are roughly a quarter of a metre square)
Then I received a link from fellow sewing blogger gMarie and knew immediately that this project would definitely allow my new little pieces of fabric to sing!

Lunch bag Tutorial from Ayumi at the Pink Penguin.

Ayumi's tutorial is a lunch bag that is just the right shape to hold those small, square lunch boxes with all the little compartments inside them (Bento Boxes).  It could be used for other things too of course - holding a hand stitching or crafty project, a little person's bag of treasures, to pop into your bicycle basket when cycling down to the village...etc.
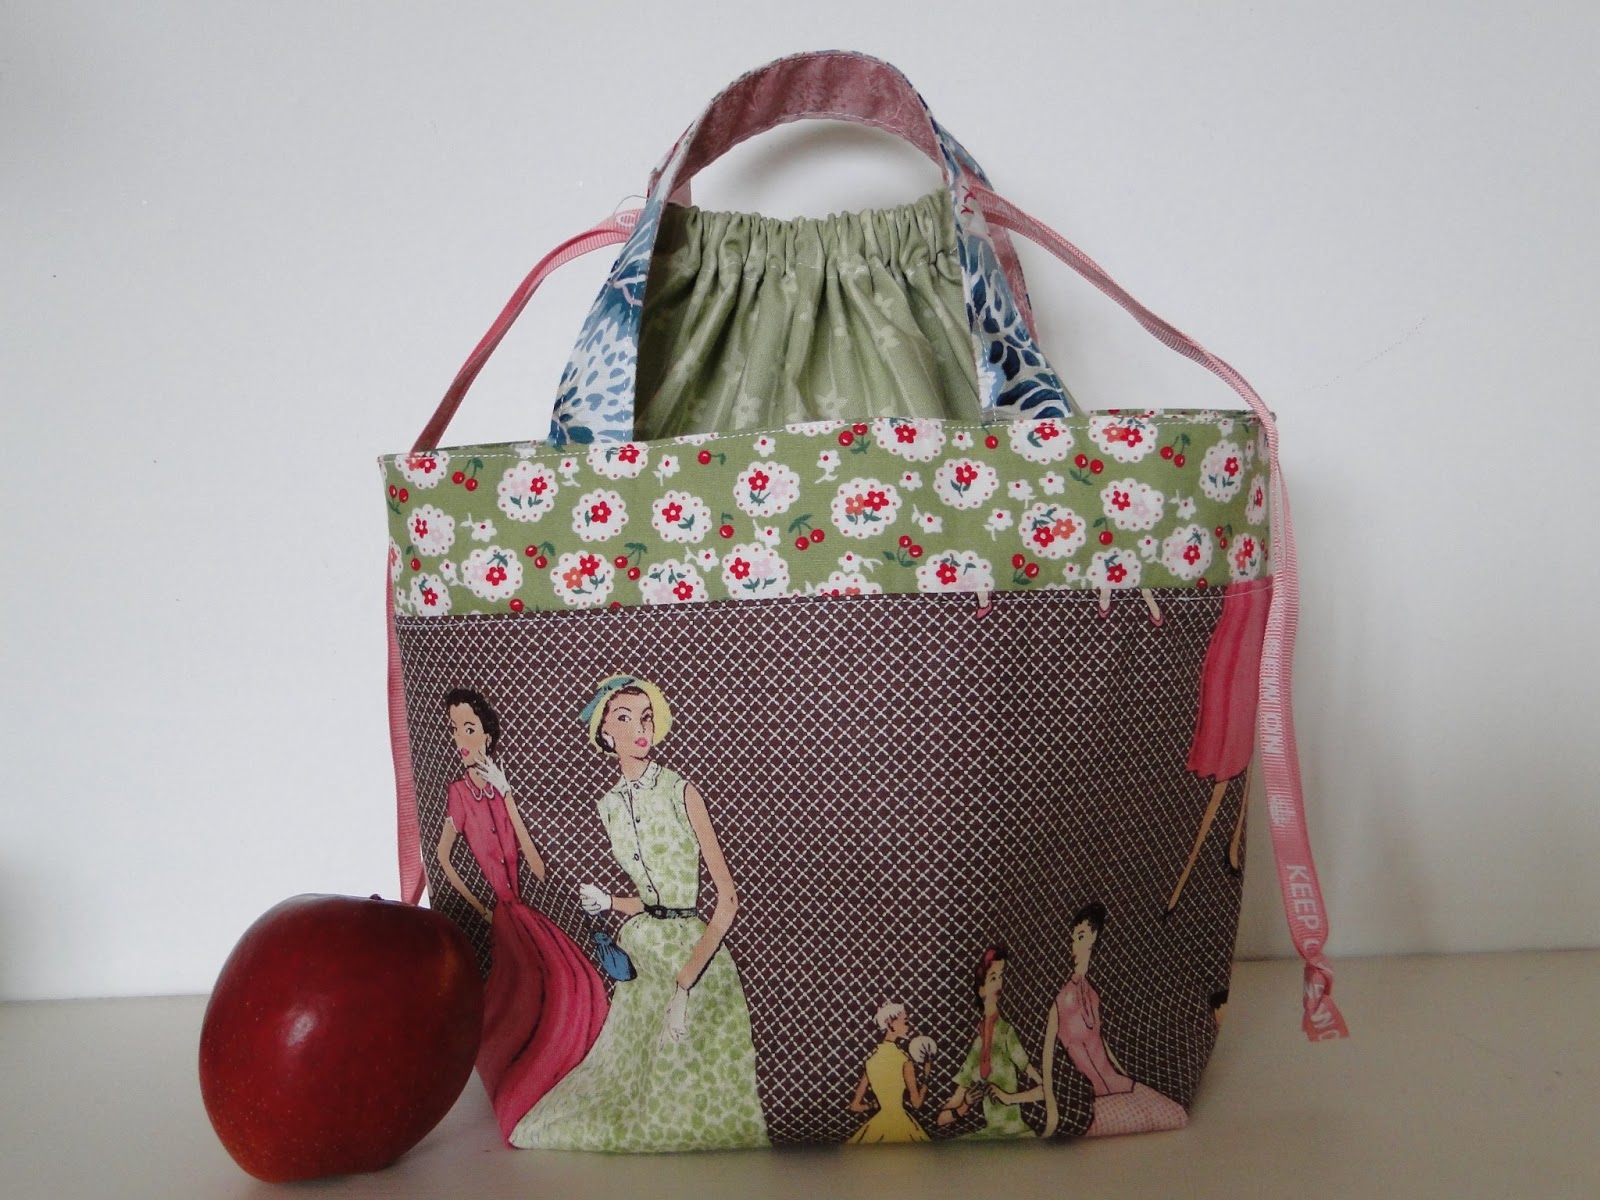
But My Very Own Lunch Bag will be used for taking my (healthy) lunch to work.  And here it is!
Yay!  I found a use for those lovely vintage ladies as well as the Kaffe Fassett cabbage fabric on the handles.
It took about a half hour of careful cutting with my rotary cutter to get all the pieces ready, then it took a couple of hours following Ayumi's tutorial step-by-step to create my very own lunch bag.  I am confident that it would take far less time if I were to do it again.
The bag has a drawstring cover to keep dust out
and would keep my lunch from falling out,
 if I tip the bag over in transit.

Hope you can read the novelty ribbon in this photo.  Such fun!
This photo also shows my one mistake - a little inserted pleat because I didn't pin.
Here is the second one I have made - this one will be a gift.

Do you ever find you just HAVE to add one of these small pieces of fabric to your shopping basket?

Tuesday, 19 March 2013

WIP updates

Having finished my course of antibiotics I do feel I'm back to my normal self this week, and have hopefully kicked this bout of tonsillitis.  I've got a busy week at work ahead, with a lot of "best foot forward" expected of me, which will be a little extra pressure, so I'm just taking one day at a time.
So to give myself some me-time, I've done a bit of catching-up at Nessa's Place this week.  Here are three WIPs (works in progress) that I've updated today:

W.I.P. 1

On and off (mostly off) I am working on some hand sewing. (I tend to occupy myself with this when the mother-in-law comes to tea) It is a hand appliqued and patchworked quilt, designed by Anni Downs.  It is going to be a lovely big wall hanging quilt for our stairwell.
Today I finally finished the fourth 20" x 20" square! This large flower pot has been a bit of a nightmare - I have not enjoyed the fiddliness of the stalk and stems at all, and I think it has taken so long to do, simply because I was putting it off.

This quilt is a Block of the Month (BOM) idea called In My Garden, and was supposed to have been finished by November 2012 but oh well, life is busy. I do like it and shall keep going with it (on and off).
Actually it is quite nice to spend an hour getting the fabric and little pieces all ready and pack it all into a little project bag, ready for picking up and taking anywhere to do a little hand stitching whenever I feel the need.  I think I enjoy this preparing work quite a lot actually... I've posted about the joy of preparation before.

W.I.P. 2

On our last holiday to the Isle of Skye I bought some materials to make a small wall-hanging quilt inspired by the colours and the landscape.  Well, I have done absolutely nothing on that since the last time I mentioned it.  Could have done a bit today but I didn't feel like it.  You know how some days one project seems more fun to do than the one you know you should do?  Well today just wasn't Skye quilt's day.

But we also bought some Harris Tweed remnants that were on sale in a knitting shop.  (Harris Tweed is made in people's homes on the Island of Harris, off the west coast of Scotland, and it is lovely)  I have pressed the pieces and cut them into workable lengths, all prepared and ready to be made into cushions for our lounge room.

W.I.P. 3

As part of House of Pinheiro's International Craft Swap, I am also working on something crafty to give to my  Pinheiro-paired partner.  Just in case she reads this post, I won't mention what I am thinking of making for her just yet, but here is a sneaky peak at some of the things I just might be using to make it. 

The idea is to make something with a Nautical theme to suit my paired-up partner, and she will make something Nautical for me.  We're supposed to use things from our stash, but I didn't have anything nautical so I got a few things at the recent Stitching exhibition in Glasgow and the Quilt show that was in Edinburgh.

I'd be interested to know what you would make from these lovely fabrics and ribbons?

Monday, 11 March 2013

and it's Tonsillitis for me!

I went to the Glasgow SECC to see the International Craft and Hobby Fair on Saturday.
I went with a card-making friend and she was thrilled at seeing an entire exhibition hall full to the brim with traders all focused on card making.  I looked around with her but of course I was just itching to get into the other exhibition hall for stitchers!

There were lots of cross-stitch and embroidery stalls, lots of patchwork and a few knitting stalls.
Only one stand had bolts of dressmaking fabrics, so I got these:

The red one is quilting cotton that I will make into the godets of a red skirt.  I don't have a pattern yet, but this fabric knows what it wants to be.  I love how the wild flowers get smaller and smaller the further up the fabric they go.
I knew immediately that the green lawn and the white/blue/red chiffon-like fabric would become the blouse from Butterick 5692.  I just love it when the material knows what it wants to be!

I am also planning to make a quilt for a niece as a house-warming gift in blues, so here are some of the fabrics I bought for that quilt:

The greens won't be going into the quilt, but they came with the selection of blues as a pack, but I don't mind as green is my favourite colour and i will definitely be able to find a happy home for them.  The brown fat quarter with the vintage ladies I bought on a whim really and have no idea what I will do with those pretty gals - probably a gift.

So that was Saturday... then I woke up on Sunday, with lots of sewing intentions, and had a very sore throat and very little ability to swallow or even move for that matter.  I was so achey all over that I took the day off work and went to the Doctors today.
Turns out I have tonsillitis.
 Ugh.
Now I am on bed rest, paracetomol and antibiotics.  Hopefully I'll be back to work by Friday.

Saturday, 12 January 2013

Half the job is in the preparation.

My own guilty UFO.

I enrolled in a Block-of-the-Month (BOM) program where I was supposed to follow an applique/patchwork pattern and get one 20" square finished each month. For the first three months I was always on target, and then life interrupted, as did other more interesting sewing and knitting projects.  So I got a bit distracted and instead of having 9 finished blocks by November I have only got 3 and a half done.
This is the progress of block number four.

Having this blog makes me feel a little accountable, so I decided I would photograph the process of finishing block 4, in the hope that I would then be re-motivated to press on with the work.


First I trace each shape from the pattern onto the paper side of Freezer Paper.

Then I label each piece to indicate position, then cut them out
(with paper scissors) and store them carefully.
Then I choose my fabric colours, using the pattern photograph as a guide.


Then I sit the pattern pieces of freezer paper spaced-out onto the fabric,
plastic side down, and dry-iron them onto the fabric.


I let them cool, then start cutting them out, leaving about 1/4" edge of fabric,
to later become the turned under hem.
Then I match the fabric colours to some thread, and keep it all together
in a zip-lock bag so that I can grab it and go, and I know everything
 I'll need is inside ready to be worked on.
All of this takes MUCH longer than the actual sewing, I spend about an hour one day doing the paper tracing and cutting, then on another day I will choose the material and press the pattern pieces onto the material and cut them out. Then on the third crafty session I can actually start the sewing part!
Actually, now that I have typed this out I have noticed that it is the same with my dressmaking.
Day one I cut out the paper pattern, for about an hour. Day two I pin it to the fabric and cut that out. Not until the third day do I actually spool on a bobbin and begin the sewing... I wonder if I could have made an entire dress in the same time as it will take for me to finish this block?? Hmmm...
Related Posts Plugin for WordPress, Blogger...